
Most of Blogger SEO options can be found under the Settings tab, under the Search Preferences section.
On this tab, you should see the following settings:
On this tab, you should see the following settings:
- Description
- Custom Page Not Found
- Custom Redirects
- Custom robots.txt
- Custom robots header tags
#Search Description
When using a search engine (such as Google.com), you probably see a
blurb of text underneath your search results that helps you decide
whether or not that’s the site you want. For example: This is what
appears when you search for “Blogger.”

The descriptive line of text that appears under the link is the search description.
If you don't specify a search description for your blog, search engines will establish one for you based on your blog’s content.
To create your own search description, just go to Settings | Search Preferences and click Edit next to "Description" to reveal a text field. Select Yes, write in your text, and click Save changes.
 A few examples of blog search descriptions:
- “A blog about social networking and web design.”
- “A journal of my year in Paris.”
- “Healthy southern-style cooking.”

#Custom robots.txt
Custom robots.txt is a way for you to instruct the search engine that
you don’t want it to crawl certain pages of your blog (“crawl” means
that crawlers, like Googlebot,
go through your content, and index it so that other people can find it
when they search for it). For example, let’s say there are parts of your
blog that have information you would rather not promote, either for
personal reasons or because it doesn’t represent the general theme of
your blog -- this is where you can clarify these restrictions.
However, keep in mind that other sites may have linked to the pages
that you’ve decided to restrict. Further, Google may index your page if
we discover it by following a link from someone else's site. To display
it in search results, Google will need to display a title of some kind
and because we won't have access to any of your page content, we will
rely on off-page content such as anchor text from other sites. (To truly
block a URL from being indexed, you can use meta tags.)
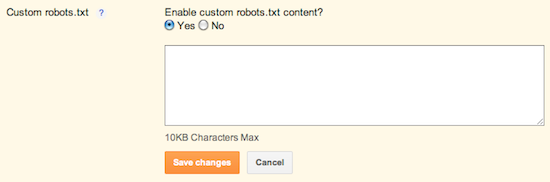
To exclude certain content from being searched, go to Settings | Search Preferences and click Edit next to "Custom robots.txt." Enter the content which you would like web robots to ignore. For example:
User-agent: *
Disallow: /about
Disallow: /about
You can also read about robot.txt on this post on the Google Webmaster’s blog.
#Custom Redirects
Blogs change over time -- posts and pages are added and deleted.
However, it can be hard to keep track of all the links that point to
URLs that no longer exist, especially if there are a lot of links to
your blog from other blogs and websites. The Custom Redirects feature
allows you to take an old URL, and point it to a new one.
For example:
Let’s say you have a recipe blog, and one of your most popular posts
is about banana pancakes. A year or so later, you decide you only want
your blog to be about gluten-free recipes, so you go through and delete
all the posts with recipes involving gluten (including the popular
recipe about banana pancakes). However, since your recipe was popular,
other blogs or sites had links pointing to your post. After you remove
the recipe, anyone trying to access the page receives a “Page Not Found -
404” error.
With Custom Redirects, you can enter the old URL that used to lead to
the banana pancake post, and redirect it to another URL (perhaps the
address of a recent post you wrote using gluten-free flour and milk).

To enter a Custom Redirect, go to Settings | Search Preferences and click Edit next to "Custom Redirects." Enter the old URL in the "Source" field, and the new URL in the "Destination" field. Click Save changes, and you’re done! To add more redirects, select New redirect.
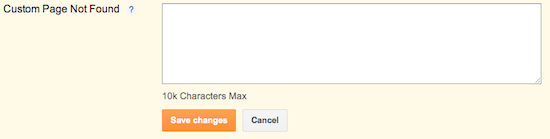
#Custom Page Not Found
If you do a Google search for “Creative custom 404 pages,” you’ll see
examples of people who have customized pages that would have otherwise
ended up looking something like this:
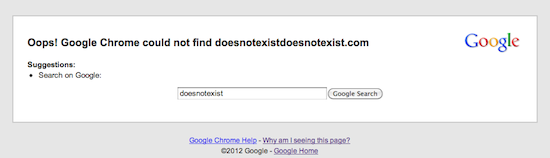
Bloggers often create customized 404 pages to provide a bit of comic
relief to their readers, and prevent them from experiencing generic,
unfriendly error messages.
If you have a broken link on your blog, or, a reader navigates to a
page that’s temporarily down, having a customized 404 page provides your
readers with a better user experience. Customized 404 pages are also a
great opportunity to provide some help to your users by linking them
back to your blog, or give a few pointers on navigation.
You can find the option to create a customized 404 page by going to Settings | Search Preferences. To enter your custom message, click Edit to open the text box. Type the copy you’d like to appear on the page, then click Save changes.
If you’d like to get more creative than using standard text, you can
use simple HTML or CSS (if your template has a style file loaded).
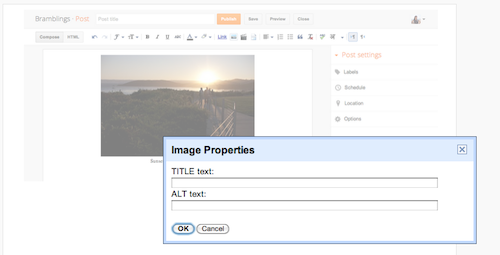
#Image properties
Let’s say you’re a travel blogger, roaming the back alleys of Paris
with your camera in hand. You’ve got some great content on your blog,
and hope that potential readers who search for cheese shops near Notre
Dame will discover your detailed, gastronomical post. Ah, but what about
your photos -- don’t you want them to be searchable as well?
Of course you do! Which is why you can now easily add "alt" and
"title" attributes to your images. To add these, click on an image in
your Post Editor, and select Properties. A text box
will appear where you can add "alt" and "title" attributes to your
image. "Alt" attributes are meant to be a description of the image for
users who are unable to view the image (due to reasons such as browser
compatibility or vision impairment), and the "title" attribute can be
used for providing longer descriptions about the image.
 Once you edit "alt" and "title" in the Post Editor, you can switch to the HTML view to confirm the modifications you’ve made to your image tag.
#Header tags
Good headings express the general idea of the content below them, and
search engines use headings to get an idea of what your post is about.
In Blogger, you can now designate text as "header" text, and the search
engine will know that the text you’ve selected represents a summary of
what you’ve written.
There are a few header tags you can add to your text, and all they do
is define the hierarchy of the headers and accordingly change the font
size. For example, here is a list of headers (in order of largest to
smallest).
<h2>This is my first heading, about the general topic</h2>
<h3>This is a subheading</h3>
<h4>This is a subheading underneath a subheading</h4>
<h3>This is a subheading</h3>
<h4>This is a subheading underneath a subheading</h4>

To designate text as a header, just highlight the text in the Post
Editor, and click on either “Heading” (<h2>), “Subheading”
(<h3>), or “Minor heading” (<h4>) in the toolbar. If you
like, you can verify the HTML you’ve added by clicking on the HTML view.
#Custom robots header tags
Custom robots header tags allow you to tell web crawlers not to index certain sections of your site. It’s similar to customrobots.txt,
but not as granular. For example, if you check the box for "nofollow"
under the "Homepage" section, it means that you don’t want web crawlers
to consider any links on your homepage leading to any other page.
To enable these tags, go to Settings | Search Preferences, click Edit next to "Custom robots header tags," and select Yes.
The three sections you’ll see below correspond to:
- Your blog’s home page
- Your archive and search pages
- Your posts and pages
Check the boxes to set the flags according to your preferences, then
view the sections of your blog that you customized (home page, archive
and search pages, pages and posts). You should see an X-Robots-Tag
header tag in the HTTP response with the selected flags.
Note: In order to see the HTTP request and response with the
header tags, you’ll need to go to Chrome > View > Developer >
Developer Tools > Network > Headers for the HTML page request.
If the feature is turned on (e.g., you’ve selected Yes), then you will see a similar interface in the "Post Settings" section of the Post Editor.
#Custom permalinks
When you write a post, Blogger automatically generates a permalink (a
URL that links to a blog post) for your post from its title. If you
prefer to use a custom permalink, you can do so via the “Permalink”
option in the Post Settings box.

Although you’ll still have the option to generate the URLs for posts
automatically, the customized option gives your URL greater stability.
For example, because Blogger automatically creates the URL from
information from your post title, your URL would change should you
decide to edit the title. This would result in broken links, and fewer
visitors to your blog.
Once you click Permalink, you’ll see that the option
for automatic posting is selected as default. To create your own URL
for this specific post, simply select Custom, and type in your new URL. If you wrote the post in March of 2012, your new URL will look like this:
www.nameofblog.blogspot.com/2012/03/customURL.html
The bolded area is the part of the URL that is customizable.
If you choose Automatic Blogger will generate the
URL from the title of your post. So let’s say you created a post on
March of 2012, and you titled it "Hiking in Vermont." The URL for that
post would look like this:
www.nameofblog.blogspot.com/2012/03/hiking-in-vermont.html
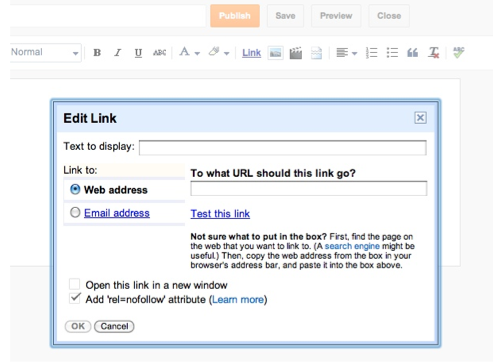
#rel='nofollow'
When you click Link in the Post Editor toolbar to
hyperlink text, you’ll notice a new option about adding a rel=’nofollow’
attribute. Checking this box means that you don’t want this link to be
considered when web crawlers are searching for information they’ll use
to index your page.
You might want to check this box if you don’t fully trust the content
you’re linking to, the link is a paid link, or simply to deprioritize
this link so that web crawlers can focus on your blog’s other content.
Remember that web crawlers look through the information on your blog to
determine your search rankings, so deciding what information they
consider affects how people find your blog.
Comments
Post a Comment